About the business
This business has been going for years and is a brilliant quality for the repairs and restoration. From the exotic chrome dreams of the USA, to the basic mainstream radio made for Mr Average. from the early 1930s people were commercially made sets were beng sold, for a new and growing market of music on the move. I can repair or restore your radio ending with an amazing quality
what can i do for you
Common faults

Repairing Radios
Though in-depth repair of car radios requires a fair bit of specialist knowledge and often some equipment there is a certain amount that can be done by the owner using only hand tools. First though, a warning. Though car radios operate from a twelve (or six) volt supply, up to 300 volts is needed across the valves and a vibrator or transformer is provided to step up the voltage. Thus a connected up and switched on valve radio can give a nasty shock to the unwary 'prodder'. So be careful! Many of the radios that I am given to restore are in pretty awful condition. The most important thing is that all the detachable knobs and switches are present; a set's internals can be repaired but, if a knob is missing, the chances are it will be almost impossible to find an exact replacement although in some cases replacements can be made.
Fault finding can be a time-consuming, painstaking business. I find that the worst faults to track down are man-made, i.e. where someone else has already had a go and attempted to make the set work. First stage is obviously to get the thing working, then bring its performance up to scratch by replacing 'soft' valves, condensers that are breaking down etc. Tracking all these faults down and circuit tracing is outside the scope of DIY as it involves special equipment. There is, however, a certain amount of simple fault tracing and rectifying that the ordinary person can do.
Parts Availability
Most components for valve car radios can still be found without too many problems; I can supply valves, vibrators etc. in cases of difficulty. The problem, as already stated, is with the trim parts such as knobs and switch buttons etc. When looking for period radios in autojumbles and sales try to find one that is complete. Don't be too concerned if the radio looks tatty; if all the original parts are present this can be rectified.
Though in-depth repair of car radios requires a fair bit of specialist knowledge and often some equipment there is a certain amount that can be done by the owner using only hand tools. First though, a warning. Though car radios operate from a twelve (or six) volt supply, up to 300 volts is needed across the valves and a vibrator or transformer is provided to step up the voltage. Thus a connected up and switched on valve radio can give a nasty shock to the unwary 'prodder'. So be careful! Many of the radios that I am given to restore are in pretty awful condition. The most important thing is that all the detachable knobs and switches are present; a set's internals can be repaired but, if a knob is missing, the chances are it will be almost impossible to find an exact replacement although in some cases replacements can be made.
Fault finding can be a time-consuming, painstaking business. I find that the worst faults to track down are man-made, i.e. where someone else has already had a go and attempted to make the set work. First stage is obviously to get the thing working, then bring its performance up to scratch by replacing 'soft' valves, condensers that are breaking down etc. Tracking all these faults down and circuit tracing is outside the scope of DIY as it involves special equipment. There is, however, a certain amount of simple fault tracing and rectifying that the ordinary person can do.
| Fault 1. Radio completely dead. i.e. no dial light, no sound when tutned on. | Rectification a. Check that fuse is OK; being the weakest link in a chain they sometimes 'blow' without any apparent reason, but check also that there isn't another fault that has caused the fuse to go. b. If the set is installed, check that the earth connection is good. Also, if the set has been installed by an amateur, check that there is a proper earth; a set will sometimes work earthing through the aerial, but reception will be affected, and aerial movement may make the earth connection intermittant, leading to intermittant operation. Check this if your set appears not to work when the car is at high speeds, or driving through cross-winds! c. Check for loose leads, loose connections, plugs in back of set loose, etc., etc. |
| Fault 2. Radio dead, no sound, but dial light comes on. | Rectification a. Check speaker is OK by substitution, also ensure speaker leads are tight. b. If radio has a separate amplifier unit, make sure that connections from this to the receiver are sound. c. Disconnect set from battery, remove cover, check valves are properly seated. Remove valves in turn, and clean pins with soft (old!) toothbrush. |
| Fault 3. Radio fuse keeps blowing. | Rectification a. Check that the fuse is the correct one. Do not be tempted to fit a higher rated one - if the correct fuse keeps blowing there is a fault with the set or its installation. |
| Fault 4. Polarity. | Rectification Many valve radios were not polarity conscious, part-transistor sets were however. A set that has been connected the 'wrong way will almost certainly need one or more replacement diodes or transistors, and unfortunately there is no way that this can be detected until the set fails to function and the above tests have been tried. |
| Fault 5. Noisy switches and controls. | Rectification Crackles and other unwanted sounds when adjusting volume and tone controls are almost always caused by dust or dirt build-up on the contacts. They can usually be eliminated by squirting a drop of WD40 into the 'pot' body. The same trick also improves wave change switches. Try it if there is excessive crackling when changing waveband, or if one band is significantly quieter than another. Disconnect the set first though! |
Most components for valve car radios can still be found without too many problems; I can supply valves, vibrators etc. in cases of difficulty. The problem, as already stated, is with the trim parts such as knobs and switch buttons etc. When looking for period radios in autojumbles and sales try to find one that is complete. Don't be too concerned if the radio looks tatty; if all the original parts are present this can be rectified.
everything you need to know about speakers

The human ear is not a perfect audio receiver, but it is the best we have to work with. lnfants can hear sounds approaching 20 kHz As we age, our hearing, like other body parts, loses some of its ability to function. A 20-year-old can be expected to hear sounds near 15 kHz, but it's all downhill from there. There are a few important considerations when deciding on a speaker system that will greatly affect your ability to hear all of the sounds your new stereo can produce. Fortunately, an automobile usually makes an excellent acoustic chamber in which to reproduce sounds (convertibles excepted). Here are the basics:
1. How speakers work. A speaker is comprised of a cone made of paper, mylar, or similar material, which is suspended from a rigid framein a way that will allow it to move in and out of the frame. At the center of the cone, a coil of magnet wire is attached to it and connectedto the radio amplifier. This is the voice coil. A stationary
permanent magnet is mounted in very close proximity to the voice coil in such a
way that a current flowing in the voice coil will cause the speaker cone to be attracted to or repelled from the permanent magnet. The cone will act like an air pump of sorts. It will move in and out at the same frequency as the signal applied to the voice coil, and with an intensity that is determined by the amount of power in the voice coil and the strength of the magnet. Speakers are rated in Ohms (the impedance of the voice coil), Watts (the power handling capabilities of the coil), Frequency response (the range of audio frequencies where the coil is most efficient) and SPL or Sound Pressure Level (a relative measure of overall efficiency). SPL ratings are an indication of how much electrical energy a speaker can transform into air movement. The higher the number, the more efficient the speaker.
2. Power Handling. Until high power stereos became commonplace, most car radios only produced 1 to 10 watts of audio power. If your original car radio used vacuum tubes, it probably had a 4 ohm speaker. If it was an early transistor radio (late ‘50s thru the '60s), it may have had an 8, 10, 20 or even 40 ohm speaker. In any event, it was never intended to handle more than about 10 watts. Your new stereo will eat these speakers and probably won't even burp! You must use speakers capable of handling at least 50 watts RMS. The output of this radio is rated at 44 watts RMS (22 watts per channel) when connected to a 4 ohm load.
3. Magnet size. Prior to WWII, permanent magnets could not be mass-produced cheaply and reliably, so early speakers used an electomagnet which required a great deal of space and power for a little action. After the war, permanent magnets became commonplace and have steadily improved. Still, the size of the magnet determines how far the voice coil can pull or push the cone. Bigger is better for low frequencies where depth of throw is important. To move a large volume of air at low frequencies a long stroke is necessary. At higher frequencies, a shorter stroke is required. less
movement means less return time.
4. Range. Your original speaker had just one cone. It was designed for AM radio. AM radio operates at the low end of the radio spectrum. There is very little space between stations on the dial. In order to prevent one station from interfering with another, the
range of audio signal a station can broadcast is limited to 5 kHz. For this reason radio speakers were never intended to reproduce audio signal higher than 5kHz. Response drops off dramatically after about 8 kltz. Adjacent channel spacing of FM stations is wide wide enough to allow at least 15kHz audio signals, which is the primary reason FM has replaced AM in the high fidelity entertainment market. Today, speakers generally fall into 3 classes: Bass, Midrange, and Tweeter. Bass speakers are the big ones. They have the longest cone travel and the biggest magnets. Cone size is usually 8-15 inches in diameter. Midrange speakers have smaller cones and magnets, but can
reproduce all but the lowest lows and highest highs. Cone size is usually 4-8 inches. Tweeters can't reproduce bass notes at all, but will reproduce high frequency ssignals up to 20 kHz. Modern speakers often have 2 or more cones built into the same speaker housing, often with several magnets to reproduce the full range of sounds. For
instance, our LS4693 is a 6x9 3 way speaker capable of handling 40 watts RMS. It has a 6x9 Woofer with a 15 oz magnet, a 2" Mylar midrange, and a 1" Dome tweeter. It has a frequency range of 40 Hz to 18 kHz with a SPL of 88 dB @ 1W/1M.
5. Location. Most ofus have our ears permanently attached to the sides of our heads and pointed forward. For this reason, the ideal location for stereo speakers would be above the dashboard and at an equal distance from the driver's head, pointed directly at him. This is not generally a practical location. The challenge that arises when installing a stereo radio in an otherwise original car is how to accomplish this without altering the original appearance We have dual speakers that will fit the original opening of many original cars which makes a quick and easy solution - with trade-offs. The 2 speakers must be much smaller than the original in order to fit. The first trade-off then is a loss of low frequency responce due to the small cone size. The 2nd trade-off is the loss ofthe stereo effect since there is not much physical separation between the speakers. A better solution would be to install one speaker in the original front opening, and the other in the rear deck. This would allow larger cones and good separation even if it is front to rear instead of left to right. Another good possibilily would be to place both speakers on the rear package shelf as far apart as possible. This provides good separation, and the trunk makes an execellent compression chamber. If you're not too concerned with originality, speakers in the kick panels or door panels work well.
6. Phasing. The little red dots on your speaker terminals are not smashed mosquitoes! They show which way the current must flow in order to push or pull the cone It is important that both speakers are connected to the proper terminals to insure that both cones push or pull together instead of trying to cancel each other.
history of car radios

Soon after radio sets started appearing in the more well-to-do homes up and down the country in the late twenties, the proud owners naturally started wondering if they could have a set to operate inside their other status symbol, the family car. Fine in theory, but this idea presented a number of problems.
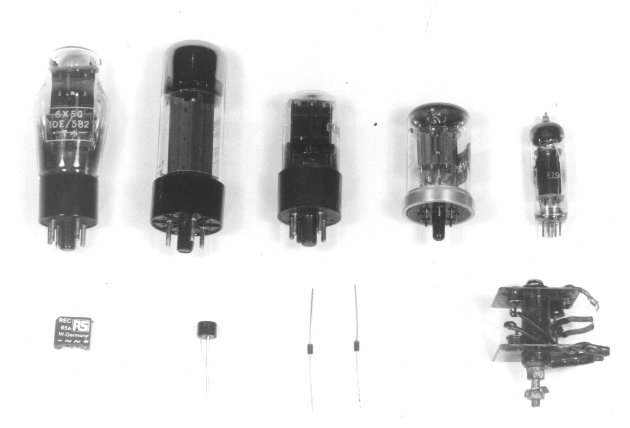
First, there was the question of power supply. Valves require between 100 and 300 volts to operate so how could this be derived from the car's six or twelve volt supply? Then there was the problem of how to make the set compact enough to fit into the car and in a place where it could be controlled from the driving position. Remember how big domestic radios were then compared to now Finally, a solution to the problem of reception interference from the ignition had to be found. Gradually, however, solutions to the problems were devised and from about 1932 onwards sets were available, though at prices only the wealthy could afford.
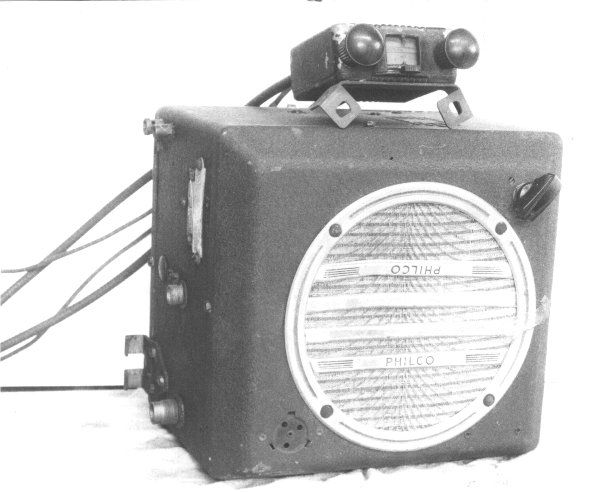
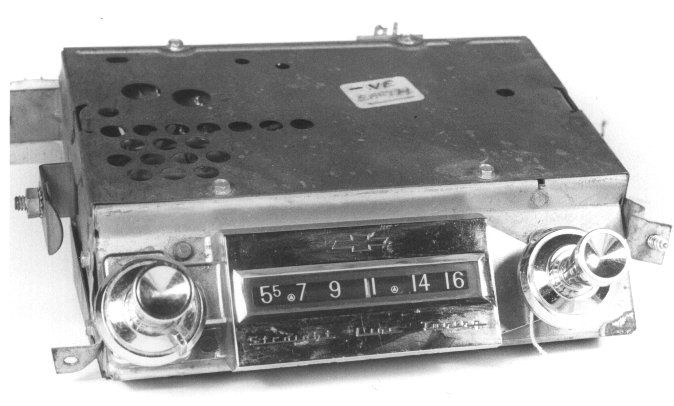
To overcome the accommodation problem, many early sets had amplifiers, tuners and power supplies contained in separate 'boxes', while some manufacturers, particularly Americans, produced sets as one large 'box' but with a separate control box connected to the set by Bowden cables. Thus, the main part of the radio could be mounted wherever convenient in the car and the cables run to the control box somewhere on the dashboard. These early sets were very expensive new, but well made and, unlike most modern 'printed circuit' devices, they can be overhauled. Surprisingly enough, the highstreet radio retailers seemed slow to realise the potential sales of car radios. In 1939, only 25% of total sales were through radio specialists; all the rest were through the motor trade.
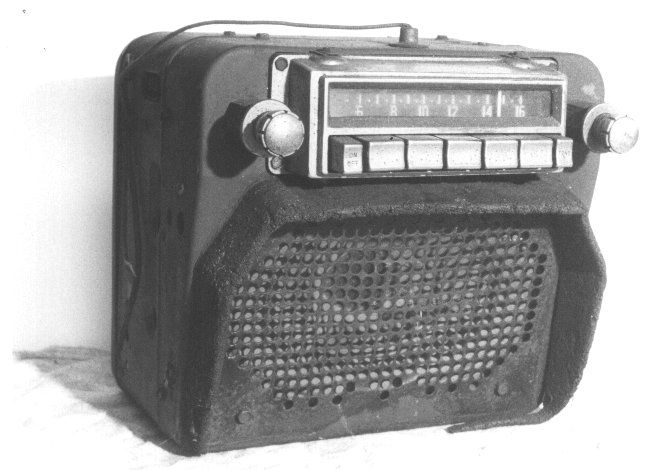
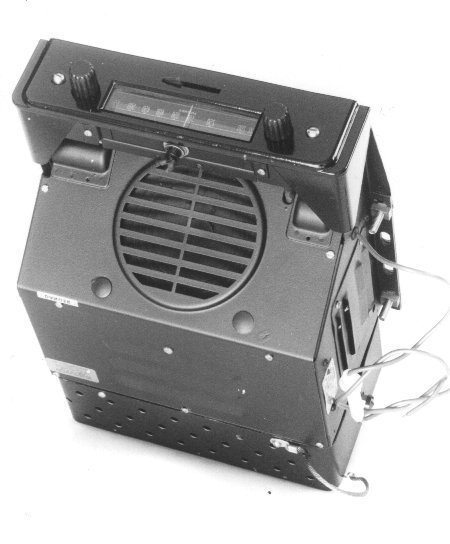
During the war car radios were banned for security reasons. The hostilities, however, provided an ideal opportunity for manufacturers to gain experience in building mobile radios for military purposes and, when the first sets after the war appeared, the development was obvious. Valves were now much smaller and many of the sets themselves were more compact though still large by presentday standards, but prices were even higher than they had been in 1939. A push-button Radiomobile cost £27 6s 0d, plus £10 4s 6d purchase tax in 1946 which, incidentally, was the year Radiomobile were formed as a joint venture by HMV and Smiths Motor Accessories. For a considerable period after the war Radiomobile operated a Star dealer network and, for those traders not fully au fait with radio installation and the often complex suppression problems, they had a fleet of green vans with experienced fitters who called at garages and carried out the fitting for them.
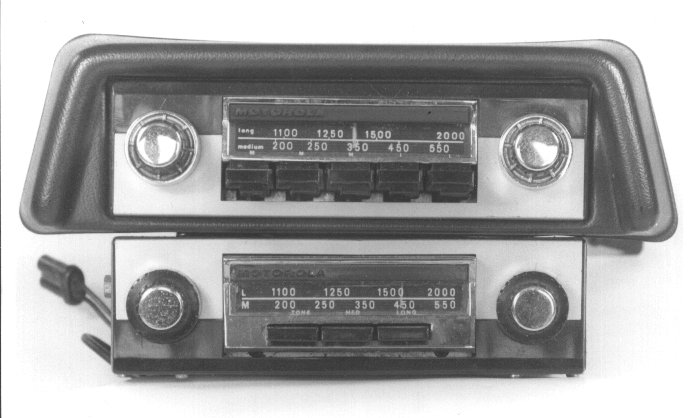
From the late fifties onwards, transistors started to appear in car radios, initially with valves, but the much smaller size and current consumption from transistors eventually won the day; valves had disappeared completely by about 1964/5.
Radios i have worked on

restored radios


